
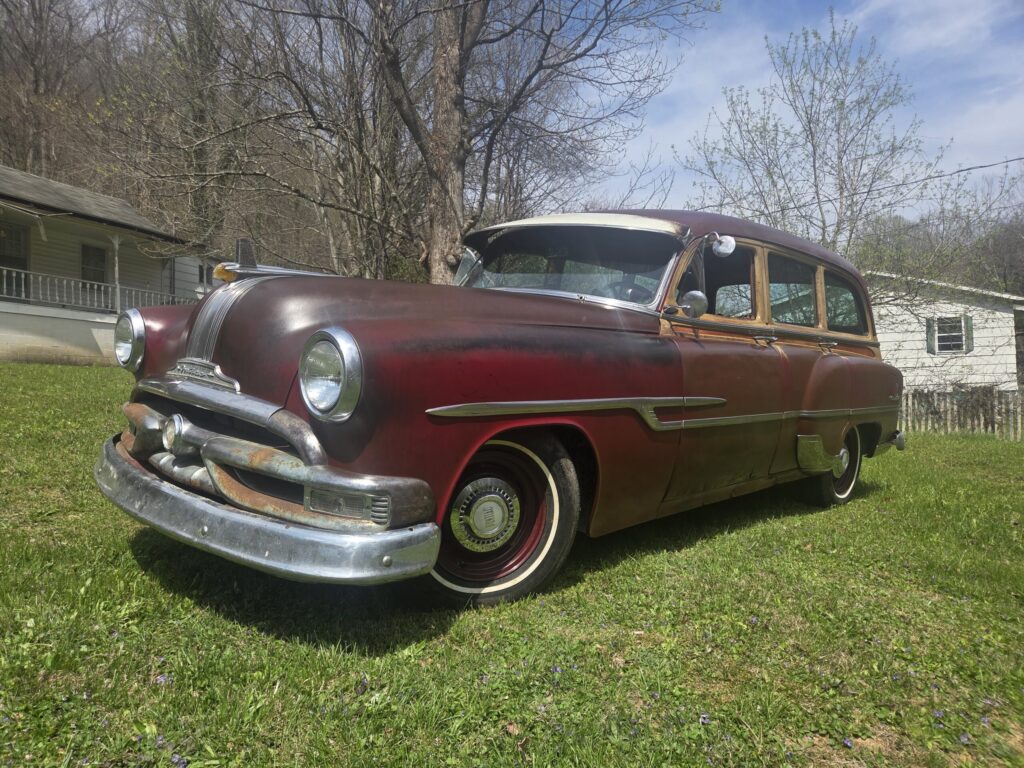
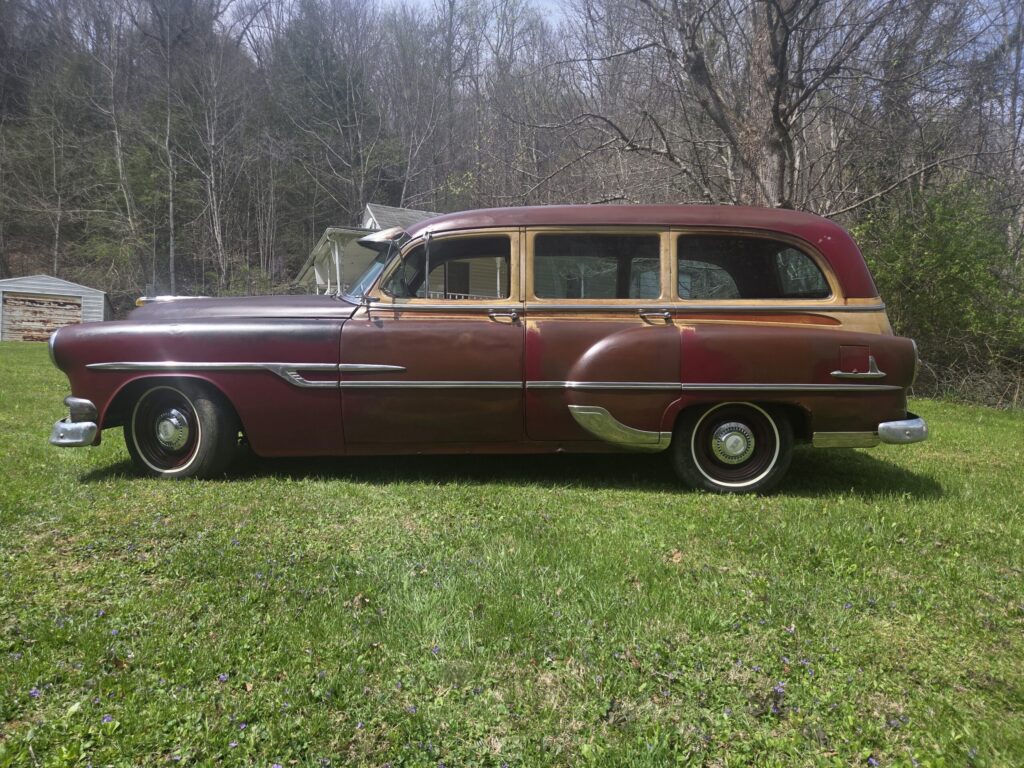
The car is officially licensed and back on the road! Over the past couple of weeks, I’ve put about 80 miles on it, mostly staying close to home. There’s still plenty left to do, but at this point I can enjoy driving it while continuing to improve things along the way.
The 1955 287 engine is running great. I did run into some trouble early on with the 1956 Strato-Flight transmission not shifting properly. Initially, I was using a 1955 throttle bracket mounted at the rear of the intake. What I didn’t realize was that the 1956 bracket positions the throttle pressure rod lower, which makes a big difference in adjustment range.
Because of the 1955 bracket, I couldn’t back the pressure rod off far enough, which kept too much pressure on it and caused improper shifting. Once I swapped to the correct 1956 bracket and readjusted the throttle pressure rod, the transmission began shifting exactly as it should. The power steering is also working great and makes the car very enjoyable to drive.
Charging System Issues & Alternator Conversion
Originally, I planned to keep the generator setup and purchased a rebuilt unit on eBay from what appeared to be a reputable seller. After installing and polarizing it.. and going through all new wiring and heavy braided grounds.. I was seeing 16–17 volts at the battery.
I double-checked everything on the car:
- System was polarized
- Wiring was all new and correct
- Grounds were all new and solid
- Voltage regulator (NOS) was swapped with a known good unit
The issue remained.
The original generator had worked previously but needed bearings and brushes, which is why I opted for a rebuilt unit. After exhausting all external possibilities, I pulled the generator back off and disassembled it.
Inside, I found:
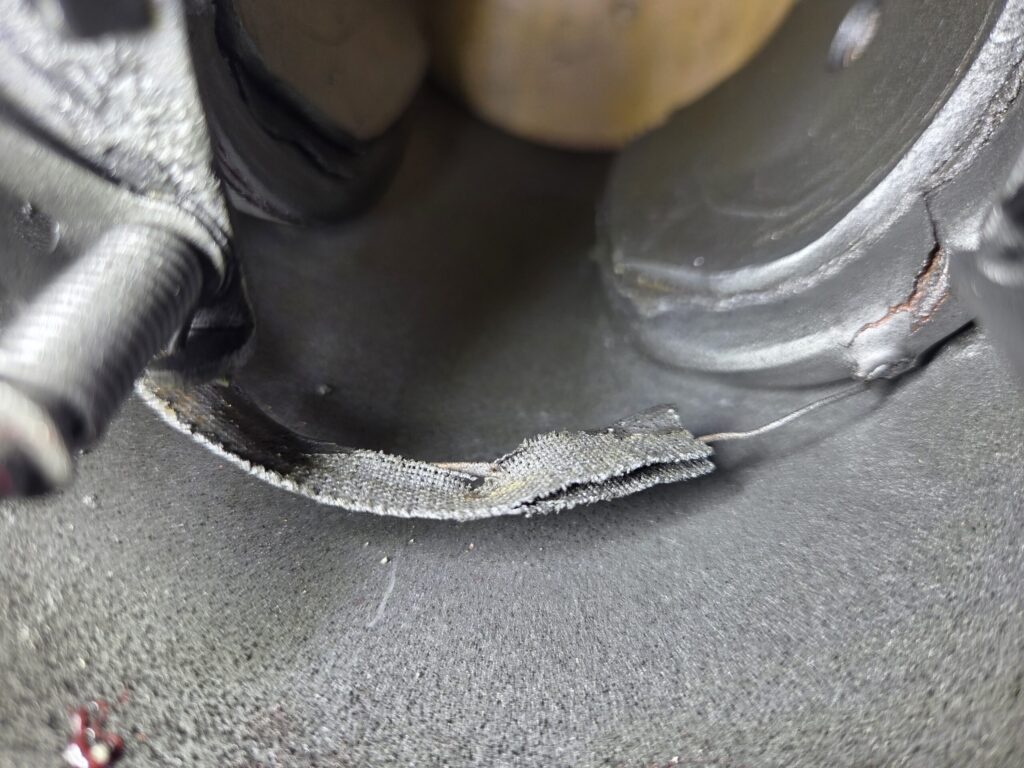
- One field coil burnt between the pole shoe and field
- The field connection wire grounded to one of the long bolts
- The fields didn’t appear to have been rewrapped and were in poor condition aside from the grounding issue.
- Other than the issues with the fields, the rest of the generator, armature, etc all looked to have been in rebuilt condition.
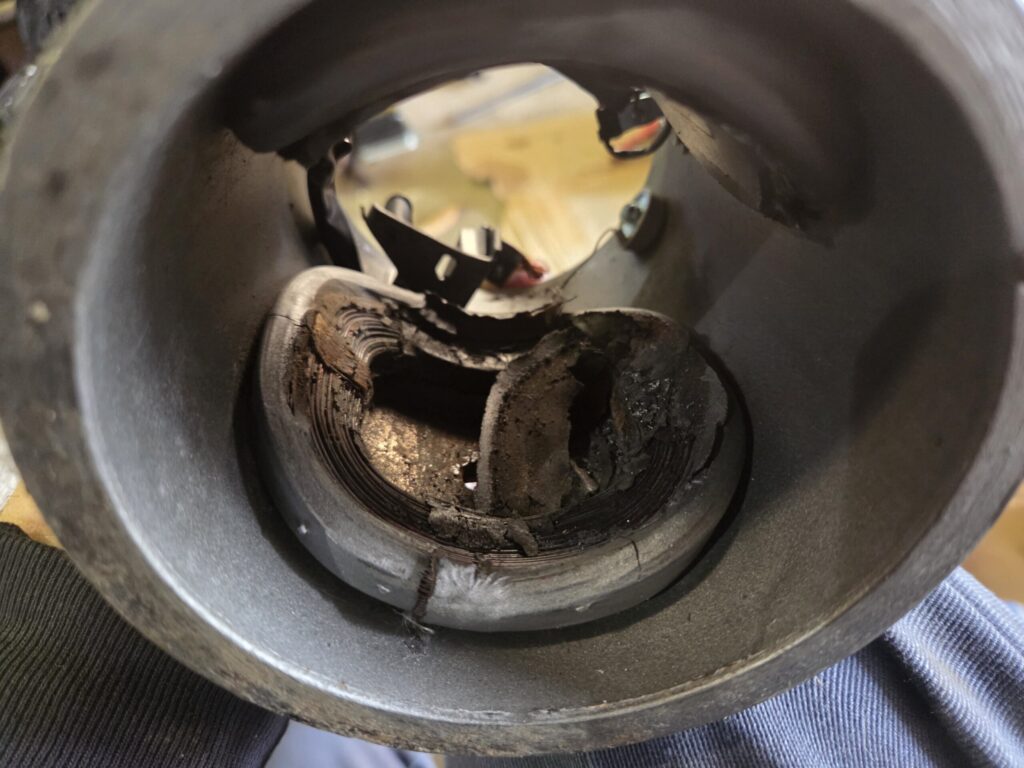
My assumption is that the internal grounding issue was bypassing the regulator entirely, causing the overcharging condition. I reached back out to the seller with these findings but never received a response back. The generator was purchased from Chargers Auto Electric in Illinois.
I’ve run generators on my cars for many years, I’ve had several rebuilt locally years ago. This is an issue I had never run into before.
Anyhow, after being out about $200 on this rebuilt generator, I decided to move on and convert to an alternator.
Generator Update (05/25/26) – A friend of mine gave me a generator for parts (1100304 – same generator number) which had nice fields in it. I was able to use the fields out of the parts generator to get my rebuilt generator working. Although, I don’t plan to use it on the wagon, I’ll likely put it on the 316 that’s waiting to be put in my 1952 Pontiac.
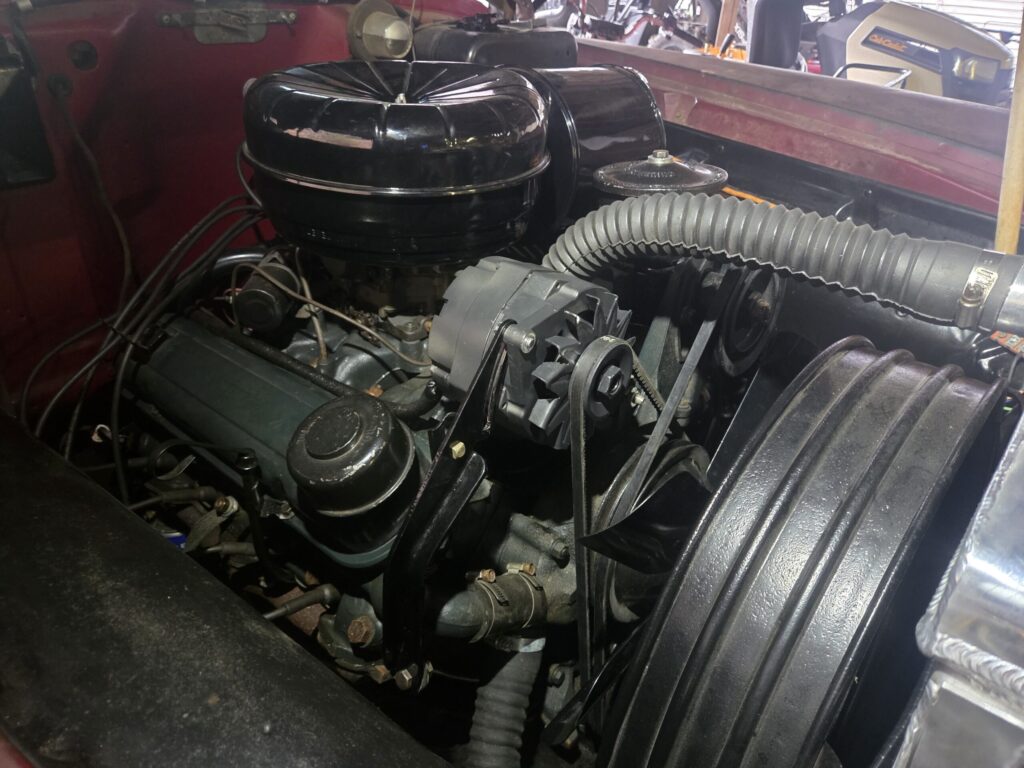
Alternator Setup
I picked up a black GM 1-wire alternator from Amazon for around $90. There isn’t really an off-the-shelf conversion setup for this engine, so I built my own mounting solution.
Here’s what I ended up doing:
- Fabricated an adjustable main bracket using the original generator mounting location
- Used washers as spacers to properly align the pulley
- Repurposed a 1959 Pontiac rear generator bracket (normally runs from the manifold over the valve cover)
- Built an L-bracket to mount to the lower bolt of the passenger-side water neck
- Tied everything together by also utilizing the original 1955 adjustment bracket for additional support
The setup turned out solid and has been working great so far.
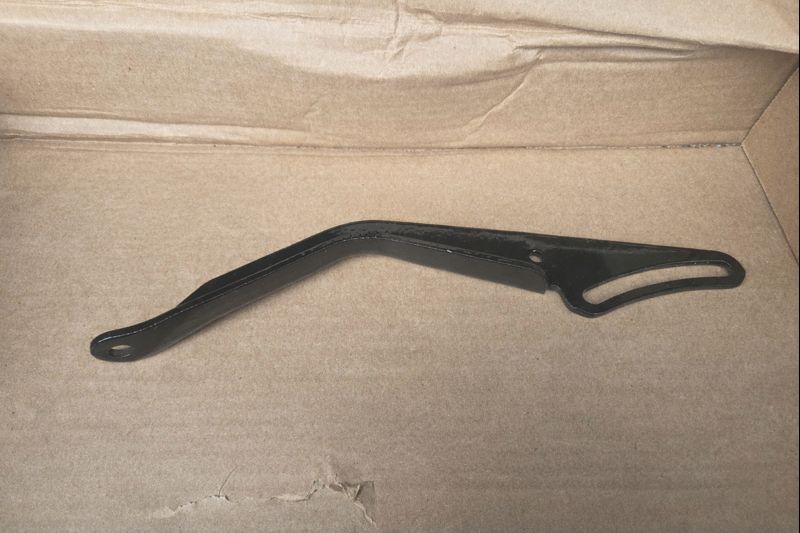
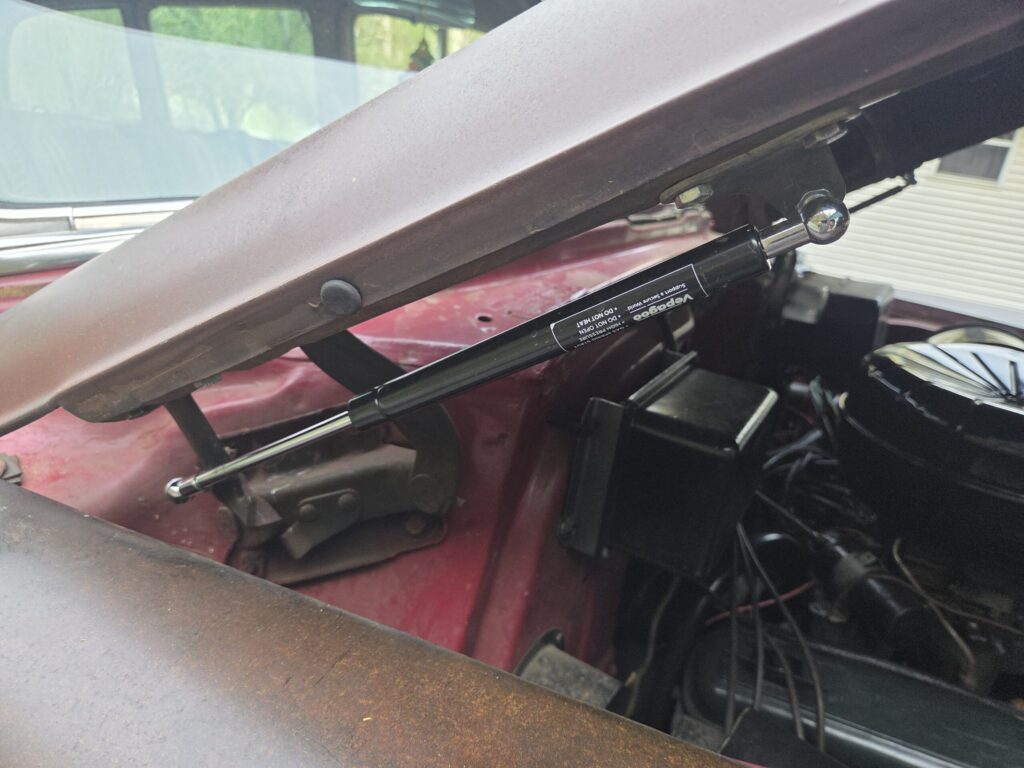
Hood Spring Replacement → Gas Strut Conversion
The hood springs on the car were pretty tired, and one of them actually broke. Rather than replace them, I decided to remove the remaining spring and convert the hood over to gas struts.
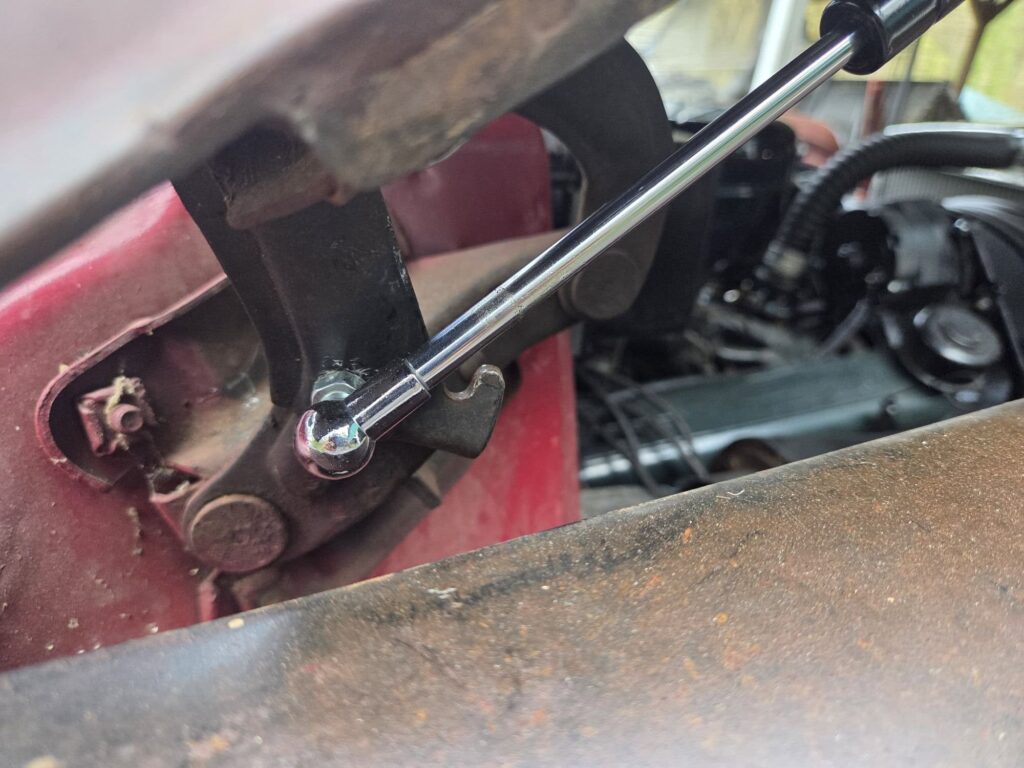
I’ve seen a few different ways people mount these, but I went with a setup that uses existing mounting points wherever possible. The front bracket bolts into the factory forward hood bolt holes, and for the rear, I drilled the hood hinge to mount the strut.
To make everything clear properly, I did have to cut a small notch in the hinge—just above the second bolt from the rear. This allows the socket end of the strut to clear the hinge and lets the hood close fully without interference.
For the struts themselves, I used the 120lb 15″ Vepagoo kit. They’re readily available on eBay and Amazon in a variety of lengths and pressure ratings, so there’s some flexibility depending on your setup. My hood has no springs and is heavily undercoated so it’s quite heavy.
The end result works great—the hood opens smoothly and stays up solid without relying on worn-out springs.
*Note, my hood still needs some alignment adjustment*
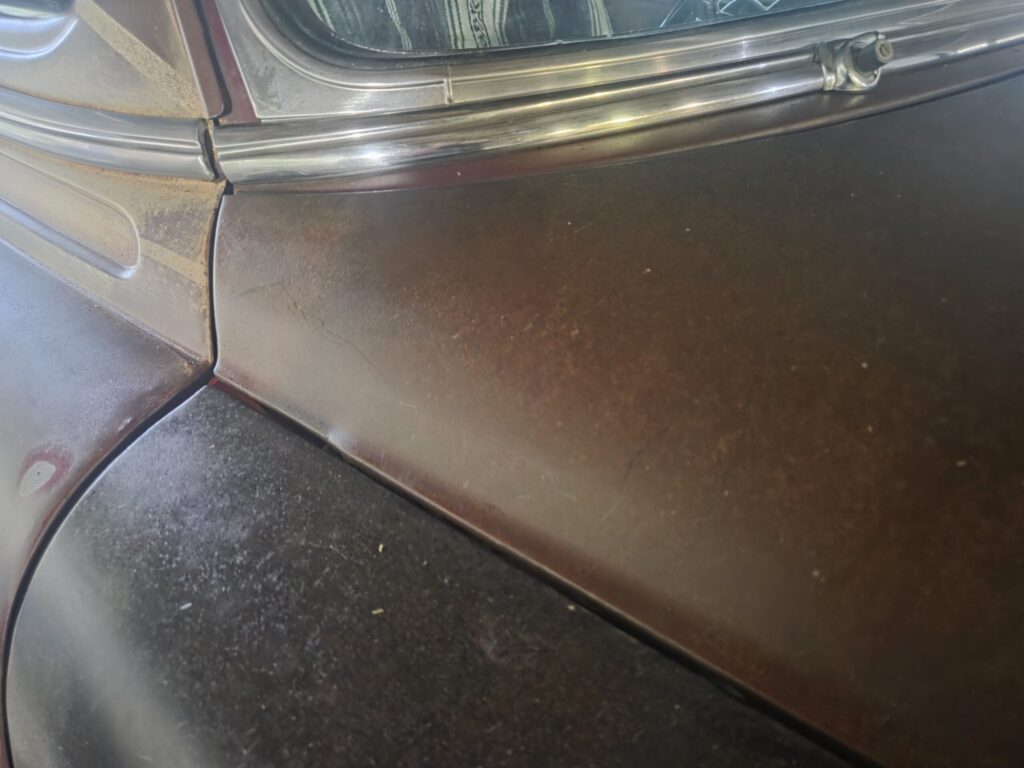
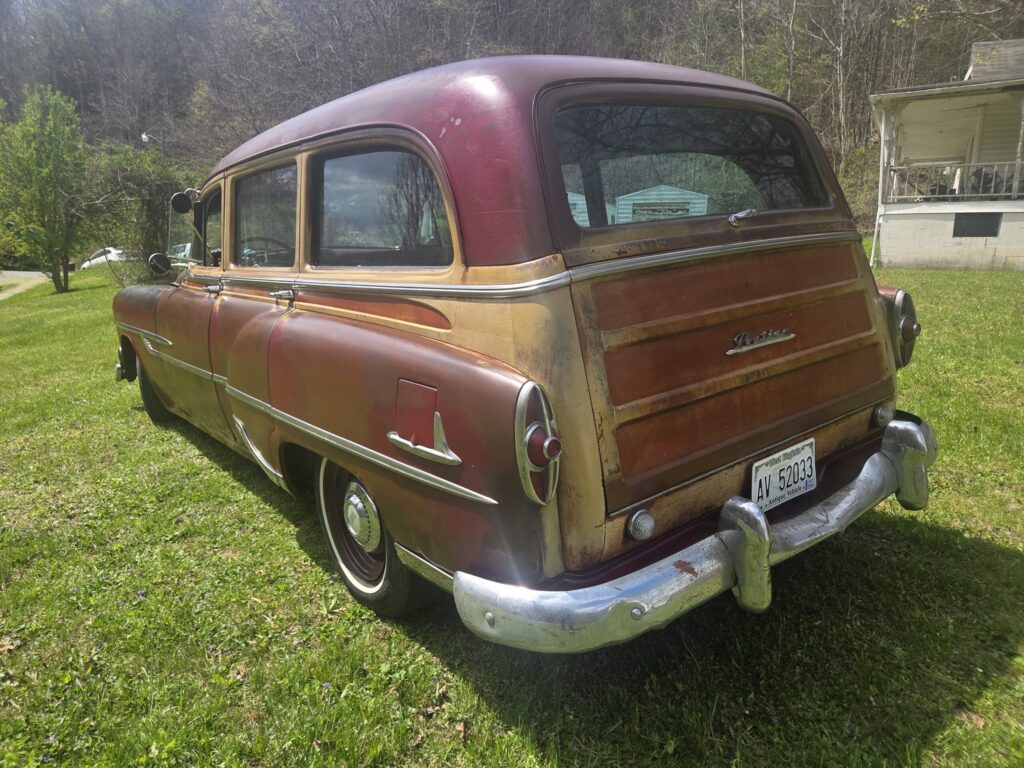
Preserving the Patina
Last week, I gave the car a thorough wash and let it dry completely before treating the body with boiled linseed oil.
I worked section by section:
- Applied the oil
- Let it sit for about 30 minutes
- Wiped it back down to remove excess and even out the finish
The results really brought the car back to life and should help preserve the existing patina. It’s not a permanent solution, but it’s something I’ll plan to redo every few months to maintain the look and protection.
More updates to come as I keep dialing things in, but for now, it feels great to finally be driving it.
Comments